Okay I’m just really bad at blogging. But I wanted to share a little more detail about this last project than I can on my Instagram (@sue_in_victoria if you haven’t been there yet).
First off – yes, I have long hair now. It was a pandemic thing. And I’ve moved to a new place, and I have a sewing studio in my house, and all that news was shared on Instagram so let’s move on to the sewing.
This is some of my new fabric from Discovery Fabrics in Campbell River. I’m an unrepentant fan of that place and may have just been responsible for their 10,000th order!!
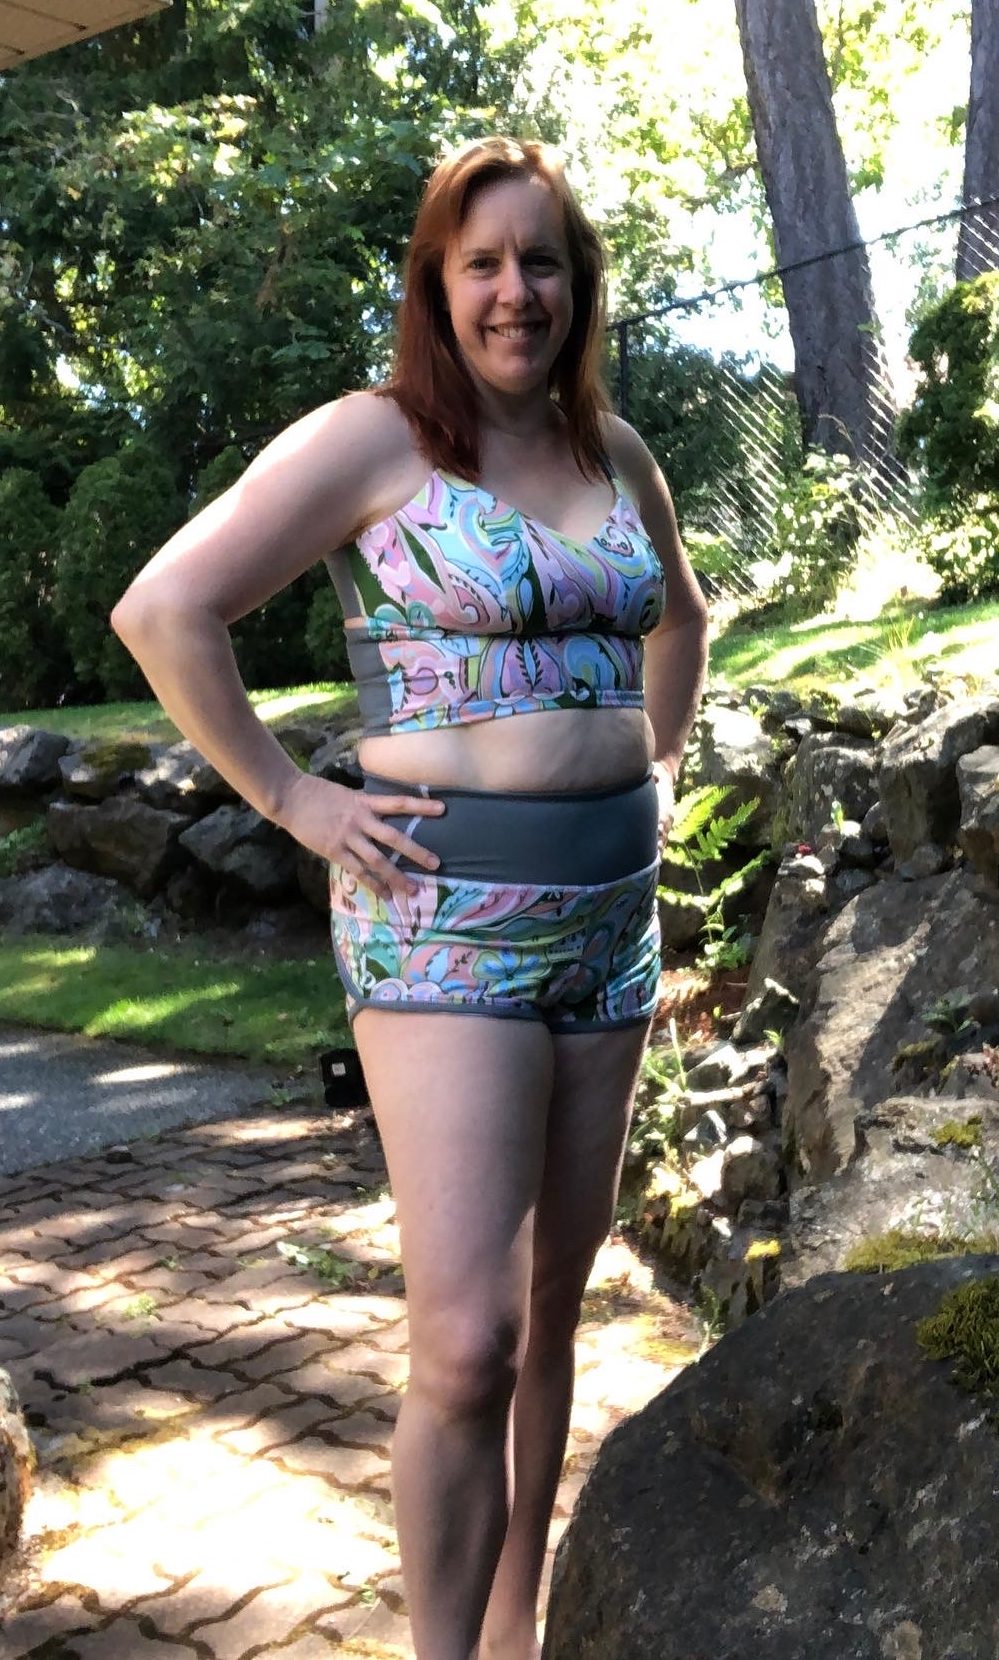
This is the “Surfer” stretch woven fabric in the “Hippy Garden” print, paired with the “Breathe Tek Athletic” fabric in “Slate” colour. The Surfer has about 10% stretch, while the Breathe Tek is about 50-60%.
The first part of this outfit was the Moxi shorts (pattern from Greenstyle Patterns) and then I made a Serena Crop Top (pattern from Sew Swimmingly). The Moxi shorts are a delightful pattern to make – quite quick once you know what you’re up to – and have built-in briefs so these shorts are ready to go to the pool!
The crop top… that’s what I wanted to write about today. I’ve seen pictures of this crop top made up in all athletic knit, but the pattern itself says it works for anything with 10% or more stretch. So I figured it was worth a try to make it up with the front in Surfer and the back in Breathe Tek. I knew I’d have to size up the front so I added 1/2″ on each side seam and also redrew the curves on the side cups to provide more coverage.
The first time making this pattern, I kept running across kind of weird patternmaking choices.
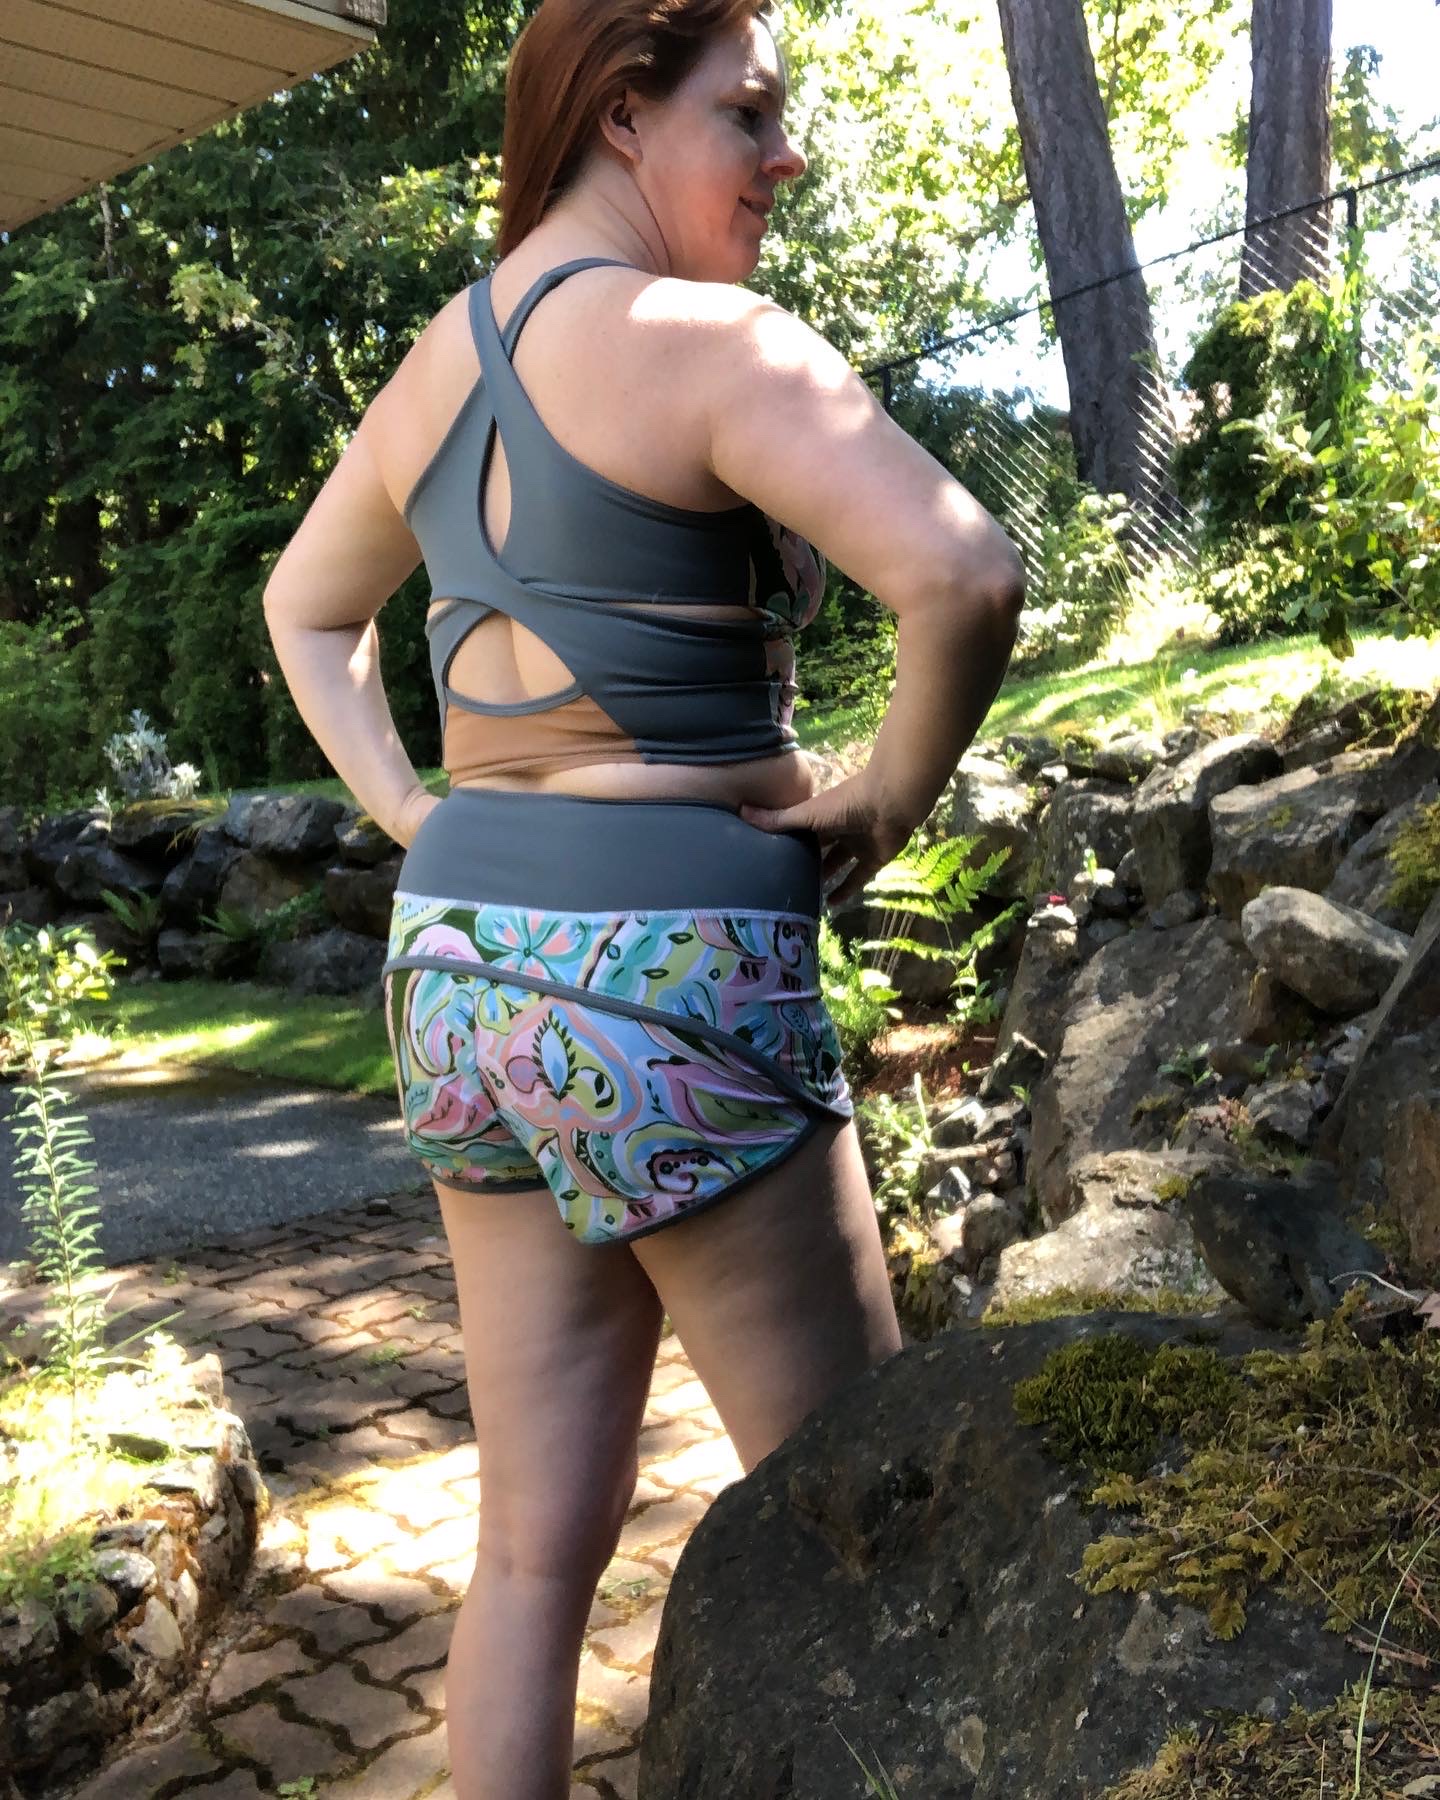
- There are separate shoulder strap pieces that you have to add on to the back, which puts a seam on the strap just as it comes across the shoulders, which I think isn’t ideal. I can see why they had to do it though – those back pieces are kind of monsters to cut out, leaving quite a lot of weird-shaped scraps that I don’t think will be much good for anything else. The cups were designed with the shaping seam coming up right in the middle of the strap attachment point, so they couldn’t put the strap as an extension of the front. You’re left with tacking on this 4-5″ extra strap piece, which is awkward.
- After going to some efforts to line your cups, you end up sewing the back to the front and just tucking the seam allowances under and tacking them down. I think that looks pretty “economical” and with very minor forethought I was able to sandwich the upper back pieces in between the cup layers to hide the seam. With a bit extra thinking, I was also able to sandwich the lower back pieces in between the front lower piece and a front lower lining piece that I added. Having the front lower part lined also let me hide the under-bust seam, so everything is nicely enclosed on this top now.
- Sizing. Okay, folks… it’s time for patternmakers to realize that not everyone wearing athletic clothing is going to be slim. Having an “XL” size with a waist measurement that maxes out at 36-39″ is not really inclusive hmm? I realize my choice of fabric for the front exacerbated the tightness of the fit on this, but the pattern DOES say “minimum 10% stretch” which is what I have.
So I have a completely finished version of this top in a smaller size, if anyone wants it. After a bit of body-image angst, I decided to just redesign the freakin’ pattern for how I wanted it to be. So here’s what I did:
- Moved the strap attachment point 1″ away from centre front. To do this, I cut off seam allowances on the cup seam and taped together the front and side cup, then cut off the strap attachment and just moved it to where I thought it should be. Then I traced the pieces and drew new curves from the strap point to the side seam on the side cup, and from the new connection point to the center front on the center cup piece. I re-added the seam allowances (by tracing them off again) and had a new shape for the top.
- I added another 5/8″ to the side seam pieces on top/bottom, front/back.
I re-cut in the same fabrics and made it all again. My serger thread kept breaking so I had to give myself a time-out but finished it up this morning and LE VOILA!
I really do like the back of this top – it’s a funky crossover and feels quite secure as well.