I’m making jeans for my little guy (who at 6 years old is already 4 feet tall and shows signs of becoming a very un-little guy). I’m using Burda 9641, but I have decided to do a real zip fly instead of the mock zip and elastic waistband in the pattern. This is a sewing challenge.
So far what I have learned is that if you’re making jeans and plan to do the contrast-colour-thread topstitching, it is far better to have sewing machines so you don’t have to constantly flip back and forth between threads. I’m only using the topstitching thread in the needle, not the bobbin, but still… I wish I had an extra sewing machine.
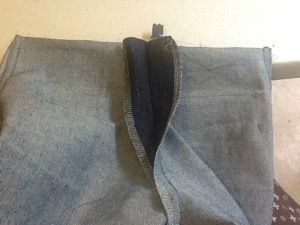
I screwed up my first attempt at putting in the zipper, and I blame the tutorial I’m using entirely. Always blame something else, yes? I won’t link to the tutorial though because that’s mean. So I’m about to go “off-instruction” and figure out how to get this damn fly to go in properly, all by myself. Wish me luck.
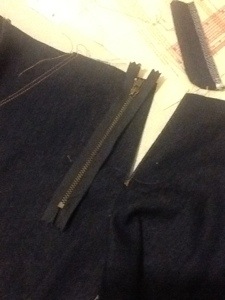
Here’s the finished fly! Yay!
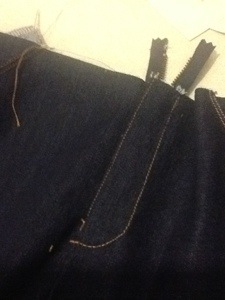
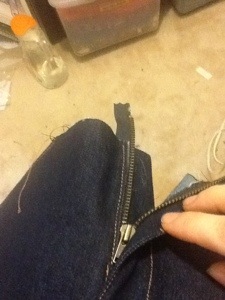
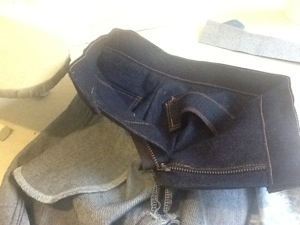
The zipper itself is a bit on the long side, but that gives me lots of room for putting on a waistband. I will have to adjust the waistband from the pattern to be long enough to go right over the fly shield. This isn’t the first time I’ve done a fly zip fortunately, but it is the first time with denim and topstitching.
Now on to the inseam and then the waistband! I might have these done before midnight tonight. Wouldn’t that be a treat?
Day 2 – fitting and waistband and hopefully finishing
I gave up last night just after finishing the inseam. I provisionally attached the waistband but realized I wanted to check the fit before going to all the effort of finishing the waistband. Good call. When I tried the jeans on The Boy this morning, there was a whole two inches in the rear that I was able to pin out. There is more looseness in the side seams but because these are for a little guy, I’m going to leave that there for comfort. He might have to hike up his pants a bit every now and then but it’s better than having him complain his pants are too tight. He grows, but not around – he just stretches day after day.
So now here we are!
And the waistband is on!
I’m just about running out of topstitching thread so I’m going to whip up hems on the legs with that before I get fancy with anything else.
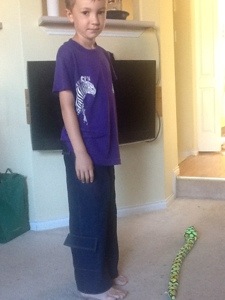
Update: We’re Done!
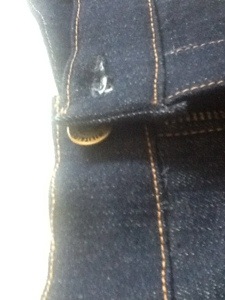
The button hole was made with the template from my sewing machine’s buttonhole attachment. The button itself was a jeans button that went onto a tack that comes through the fabric. I’ve never used one of those before and it was very easy to put on.
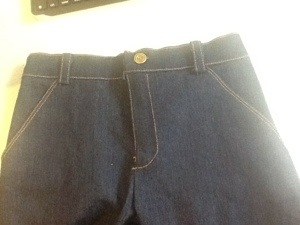
Here’s the overall look on the front. The belt carriers were tough to sew on with the machine – definitely need an industrial strength top-stitching machine for that.
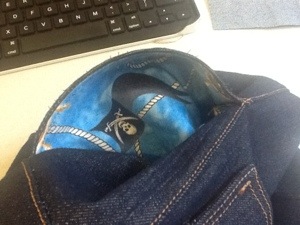
The other little secret in these jeans is that the pocket backs are made with the cute pirate fabric I used to make the boy and the hubby their matching Father’s Day shirts. So when he puts his hands in his pockets he’ll remember both mom and dad. Yay love.
And that’s it! 😀