So for those of you who occasionally come around here expecting posts about civics & current events, you’ve got to wonder what kind of blog I’m running here. Well, it’s my blog and I like sewing a LOT and I feel like blogging about it, so I will continue to do that in amongst occasional bits about payday loans and politics.
Today I am going to try to do something that I haven’t done very well in the past: create a sleeve to go on a dress I’m making. Here’s the dress. 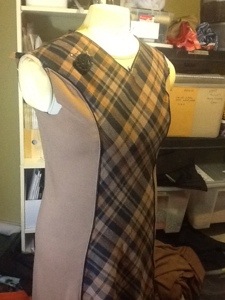
Here’s my work table all set up to follow a tutorial about sleeves.
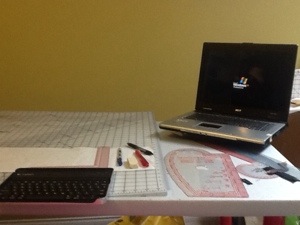
Yup I’m still running Windows XP on my laptop. It’s from 2006. I’d call it the “old” computer but there’s a 2003-vintage Dell Latitude in this household which still runs like a charm. But I digress.
The YouTube tutorial I followed included measurements for sleeve cap height based on a dress size. I chose a size 12 and drafted my first block based on that. I then cut it out of an old bedsheet, adding about 5/8″ seam allowances, and tried it on. While it was the right length, the sleeve cap did not fit, nor did the bicep. I have these rower’s muscles, you know. 😀 So following the instructions in the Sandra Betzina Fast Fit book, I slashed the pattern piece vertically and then raised the sleeve cap. Here’s what my block looks like now:
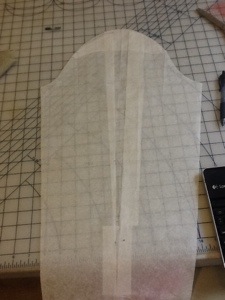
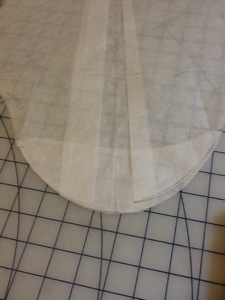
You can kind of see in that second photo where I added height to the sleeve cap. I’ve cut it out of more bedsheet and stitched it together, and it fits quite well.
The purpose of a sleeve block is to give you the basic fit for a garment piece, but then you need to adjust it for design purposes. It’s not comfortable to wear a sleeve that is perfectly fitted, usually. For the dress I’m making right now, I’ll actually re-trace this sleeve block and then slash it in two places so I can insert the plaid fabric down the outside of the sleeve and make the rest of the sleeve out of my double-knit. Because I like to make life difficult for myself I will be trying to make the lower sleeve in one piece so there isn’t an underarm seam. With the double-knit being stretchy, I don’t need to add any ease to this block for fit. If I were making a pattern out of woven or less stretchy fabric, I would probably add 1 to 1 1/2 inches of ease.
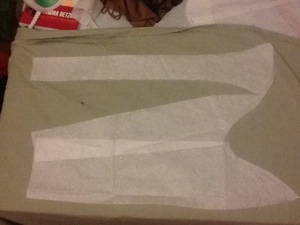
The next step for this was to trace the original sleeve block onto new paper and then slash it into 3 pieces, then put the sides together at the underarm seam. This creates two pattern pieces, one which is cut out of the plaid and the other out of the knit. Here are the pattern pieces, and the finished sleeve:

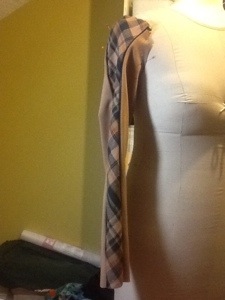
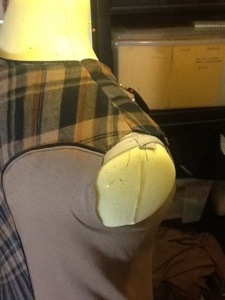
That picture gives you an idea of the blocking on the arm.
With the dress itself, I realized when I was putting together the seams on the sleeve that things go together much more smoothly when I use Lite Steam-a-Seam to “baste” the zipper to the plaid, then the knit to the zipper, so layers don’t shift or stretch during the stitching. So then I decided to take out the princess seams on the dress and re-do them with this new technique. OH MY GOODNESS. It took forever. I had topstitched each of the seams so I had to take out two rows of stitching on each seam. All told, taking it apart and putting it back together took me three hours. So much for making another garment tonight!! I’m now working on the hem of the dress, after which I will re-make the neckline because it rides too high and bugs me. Should be wrapped up around ohhhh 11pm?