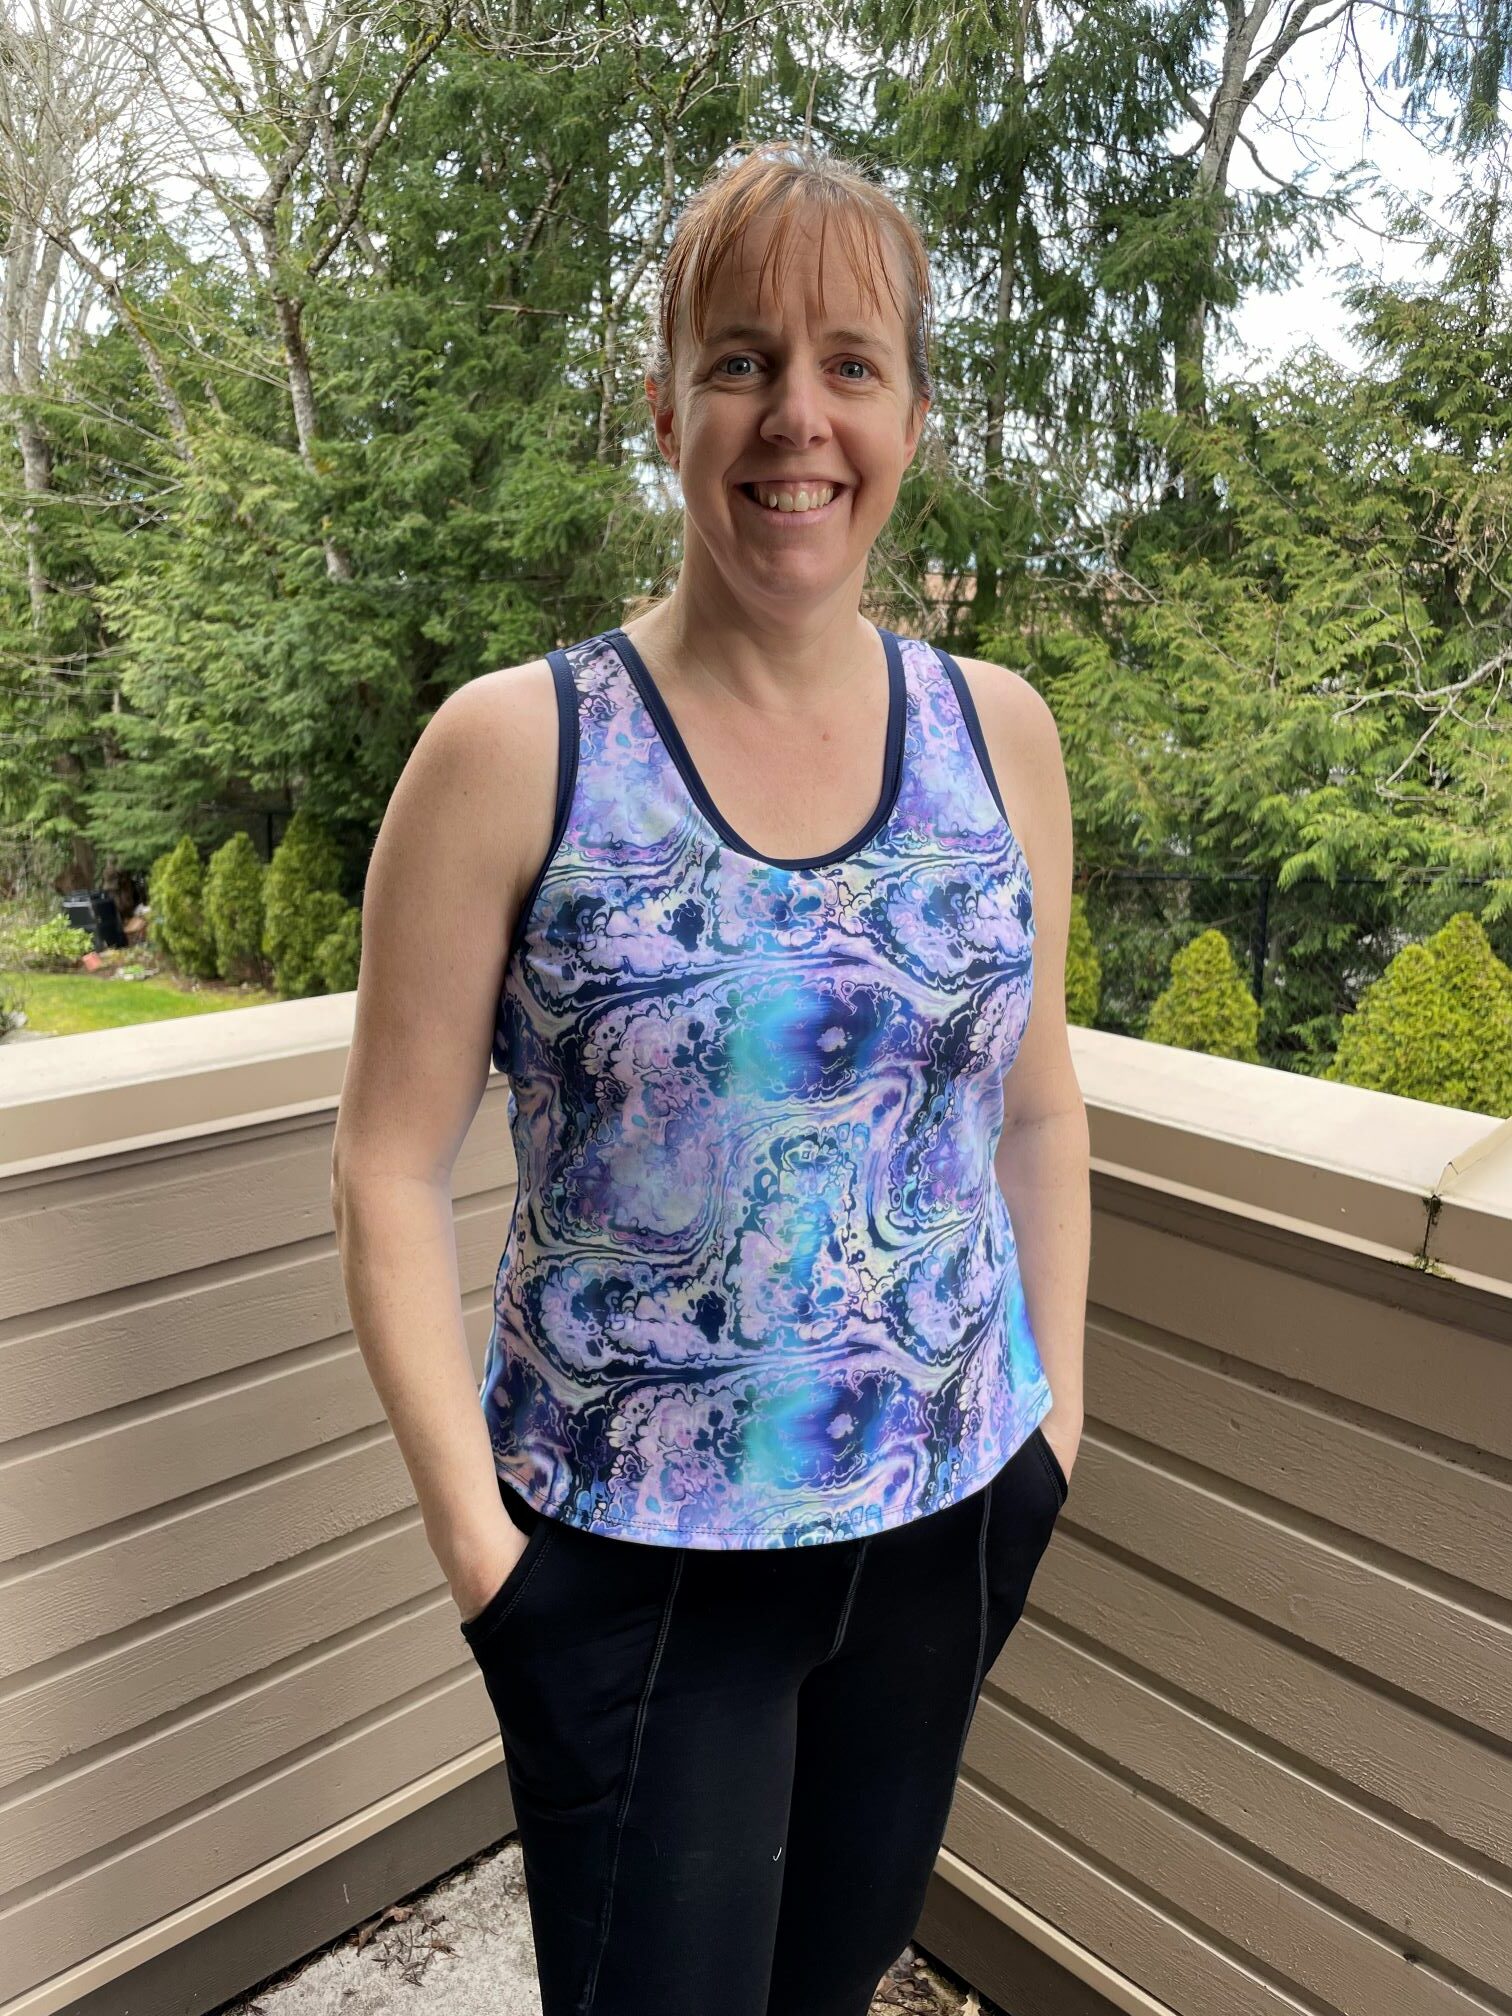
My Wardrobe Sudoku plans include an athletic tank top with built in bra — it’s a style of garment I like a lot in the summer. What’s odd is that when I went searching through my pattern archives for a copy of the pattern I used a couple of years ago to make one of these, I couldn’t find it – or anything else particularly useful. Rather than take the time to draft a new one, I figured I would just buy a pattern like this. That proved to be much harder done than I imagined! Hey indie designers – there’s a whole in the market for a non-bathing-suit tankini with built-in bras! (The Jalie Pika is close but not the style I want). Anyhow, I digress. I selected the XYT Top from FehrTrade Patterns, and went for it.
Because I am all growed up now and know how to save myself from tears, I decided to do a muslin in the same type of fabric (Breathe Tek Athletic) that I was going to use for the “good copy” of the garment. I have lots of scraps of Breathe Tek in other prints, so after a long period of humming and hawing, I decided on using up the last big-ish chunks of the Precious Metals print, and off I went.
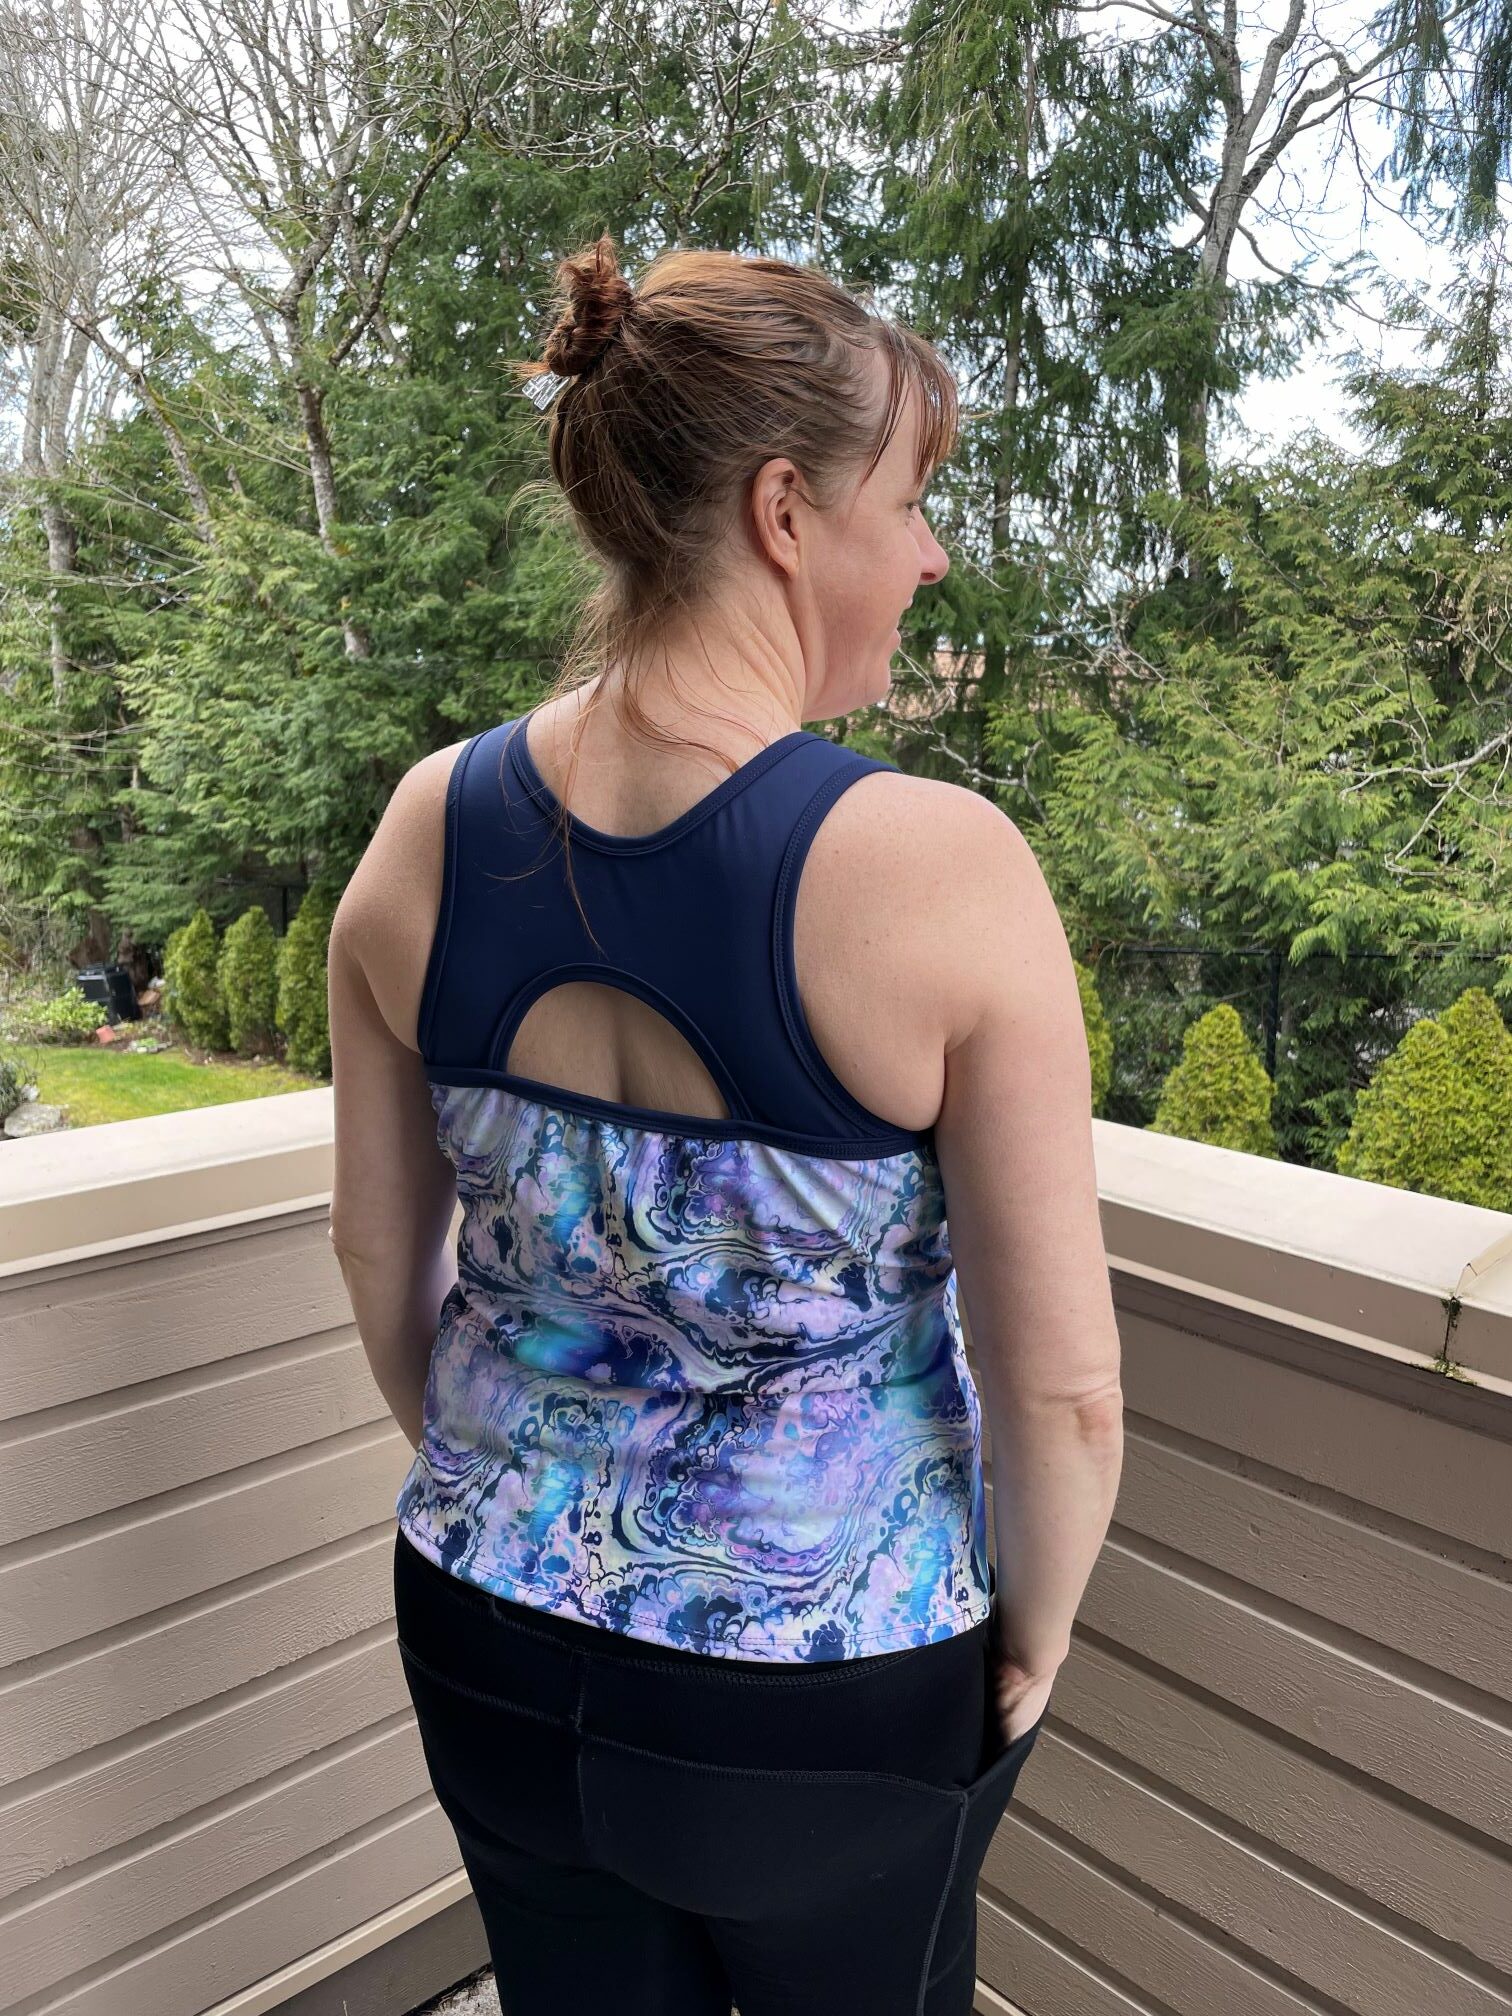
The XYT Top includes a compression bra which is intended to hold your girls firmly enough to run a marathon in, and to accomplish this it uses two layers of power mesh cut smaller than the main fabric itself. The two layers are stretched to match the outer fabric when you baste together the armholes and necklines, and then you bind all the layers together. That part (the stretching, the basting) is quite straightforward, but this is where I ran into the problem with this pattern: if your power mesh is too firm, even though you can stretch it to size, it actually gathers in the edges of your outer fabric and you get this awful granny-panty look at the neckline and armholes. When I did my first muslin I had foolishly not pre-read the reviews of this pattern on PR; had I done so, I would have learned that many other sewists have found this a frustrating pattern to work out.
So, putting aside my first version (which I struggled with mightily because I was also trying to get my coverstitch binder attachment to work, and it was not behaving), I re-cut another version in other bits of the same fabric type, but this time sized up to the XL and added about 2cm to each side of the front and back lining. I basted it all together but STILL I could tell — thankfully before I tortured myself with the bindings — that the two layers of power mesh were just not going to play nicely. So I switched out to using one layer of power mesh and cut it using the same pattern pieces as the outside but took a smidgen off each side seam. This finally came together fairly well, and I got my first completed muslin.
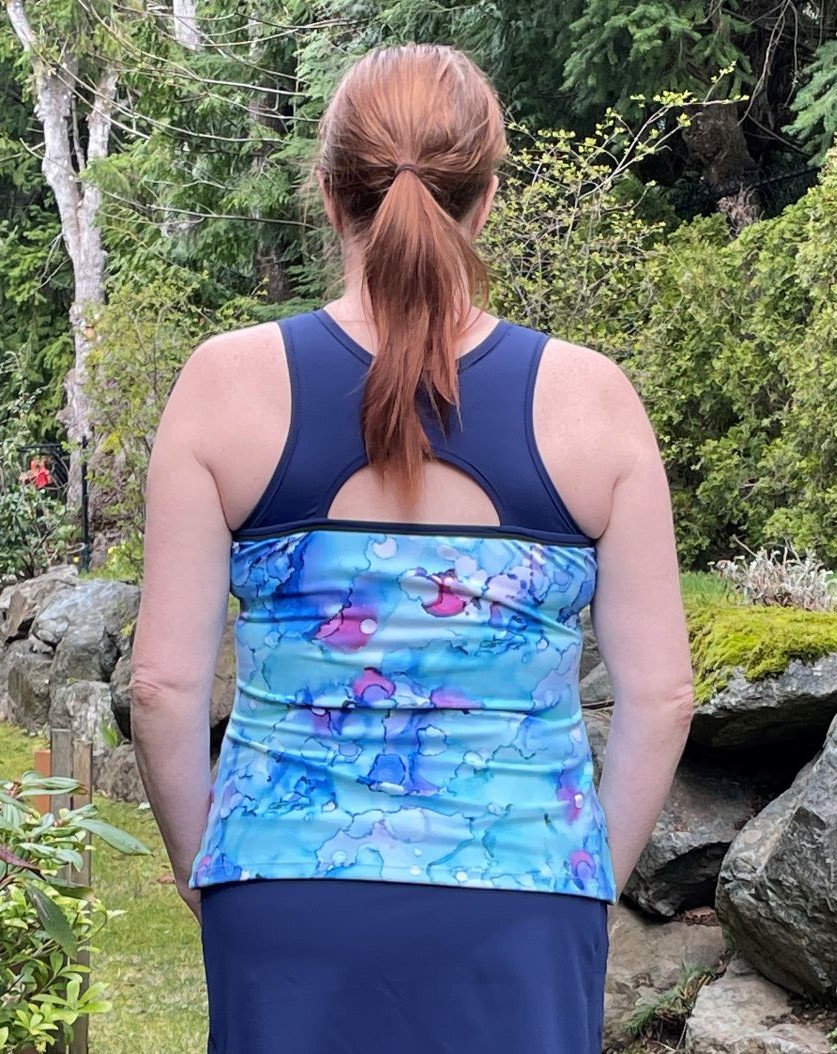
This version uses the “Oil Slick” print of Breathe Tek. (I’m also wearing some me-made leggings in Power Stretch Fleece Backed. It was cold this day!)
So with a mostly-fitting, mostly-functional muslin on my hands, I then went ahead with my “final copy” in the Paint Drops print of Breathe Tek. I had nearly run out of white power mesh by this point, so I had to deconstruct the earlier built-in bra and reclaim one of the back pieces, hoping that it would work out okay. Fortunately, it did. The back piece isn’t as critical to the fit as the front piece of the lining.
It was sewing the binding onto this final copy that really bent my brain out of shape. One thing I’ve discovered is that of my two domestic sewing machines, one of them will sew Breathe Tek quite happily, while the other one will just NOT. Exact same needle, exact same thread, exact same bobbin, exact same stitch and stitch settings. One machine is a Kenmore, made by Janome, circa 2000. The other is a Janome HD 3000. The first one will not sew Breathe Tek under any circumstances without skipped most or all of the stitches. The HD 3000 will sew through Breathe Tek like it’s a sunny walk in the park. So, if you’re out there, and you’ve been having troubles with sewing the Breathe Tek (or other slightly spongy/soft knit fabrics like thicker scuba) then know — it may not be you, or the needle, or the thread, or the settings.
When it comes to my coverstitch, I have been having on-again off-again issues with skipped stitches on Breathe Tek. As I was sewing on the binding I kept having to stop and redo the work. I thought it was more related to the binding attachment, although I did try changing my looper thread (my coverstitch is a Brother CV3550 btw) to regular serger thread and back to Maxi-Lock Stretch. I tried new needles (I’ve been using the Organ ELx705 90/14 SUK needles). I tried changing the presser foot pressure. I tried changing the looper thread tension. I got enough done on the binding that I was willing to call it finished and switched to the hem, and that’s where things got REALLY sweary. No matter what I did, the needle thread would start skipping on the right needle, but not consistently. I tried new Organ needles again, etc. etc. Finally in a last-ditch Hail Mary, I changed out the needles to Singer ELx705 100/16 Round Sharp needles. I don’t think these are SUKs though. And you know what? IT WORKED. Beautiful stitches, even over the seam allowances. Frickin’ ARGH FRICK GARSH GODDAMN IT FUCK.
Anyways. I got ‘er done, finally.
I also tried to get my teenager (and his boyfriend, who has proclaimed himself “better at social media” than my kid) to take photos of the final version along with the skort I made earlier this week. I said “does everything look smooth and properly in place?” before they took the photos but… Yeah, not so much. I’ll have to re-do the photo shoot at a later date, but these are good enough for now.


My final verdict on this pattern is that I really like it now that I’ve got the built-in bra situation sorted out. There’s still a bit of bubbling at the front neckline, but that’s easy to ignore. I like the X-back shaping here. There are other options for the back which I’ll probably try out some other time, but this feels good and secure. It is a bit odd that the back X pieces are just sewn straight to the top of the back piece, in behind the binding. I could maybe go over that again with the coverstitch so the raw edges are finished inside the back, but I am not in the mood to do so right now. I’m going to go do the pattern review and move on.